Building a data warehouse used to involve months of effort, tens or hundreds of thousands of dollars in development costs, and an expert who knew how to interpret the data. While you may still need the expert, you can get started with collecting your data using this tutorial – no coding required. This will allow you to immediately start looking at your data to find ways to improve your business.
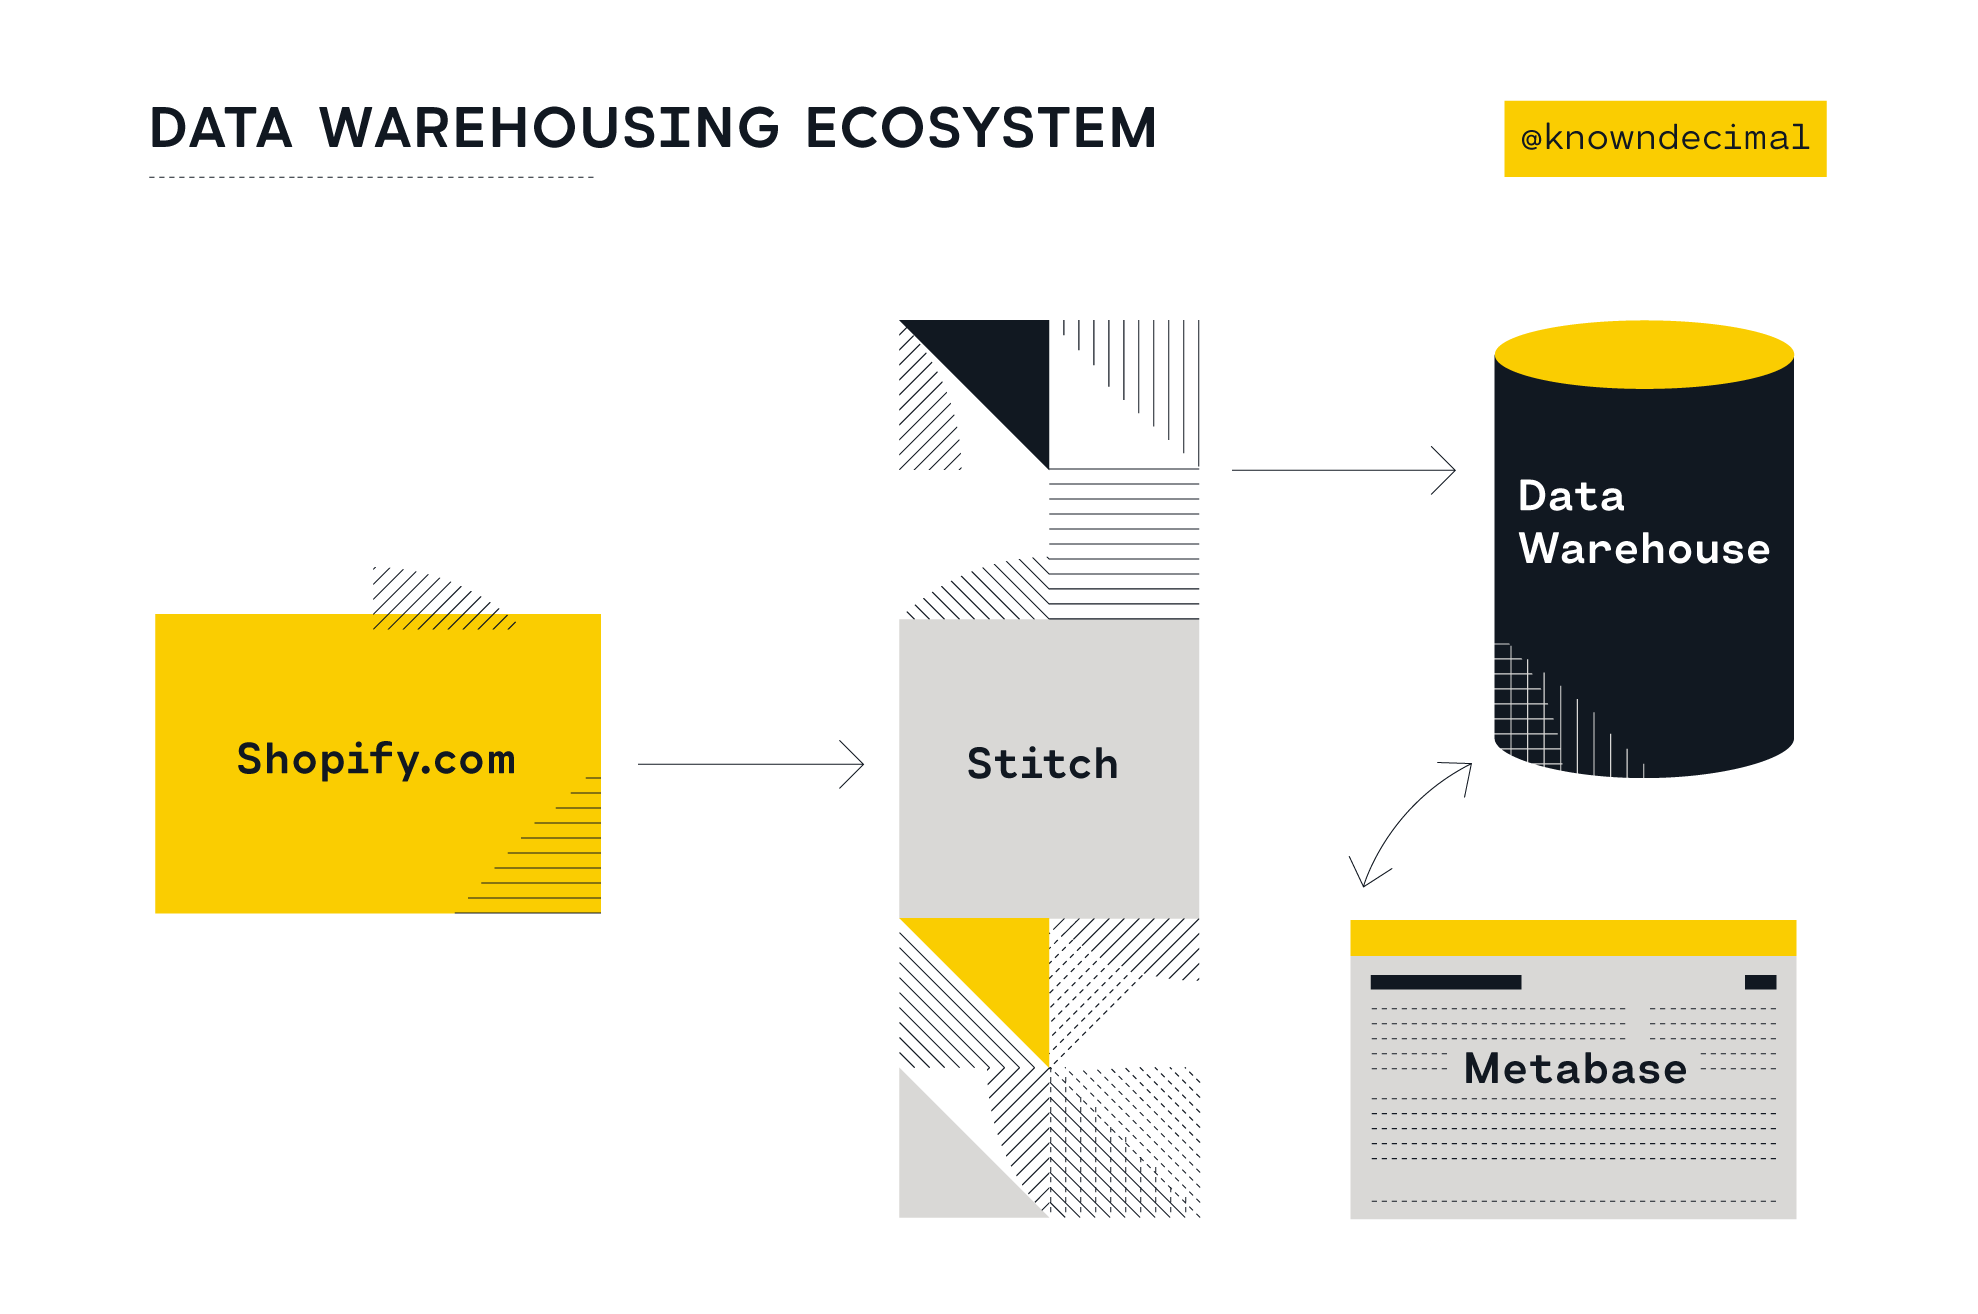
Before getting started, you will need an existing Shopify store. Everything else needed will be set up and configured in this tutorial. Here is a quick overview of the system we are about to build.
The services used include
Your Shopify store
Metabase – an open source web-interface for exploring a data warehouse
A PostgreSQL Database – used to store the data in our data warehouse
Stitch – a service that moves data from one place to another
To get started, we are going to begin with the end in mind and set up the interface that will be used to view our data warehouse. My favorite tool for this job is an open source project called Metabase. We have used this with several clients to allow them to explore and visualize their data, and share those results with others.
Metabase is a self-hosted solution, so we will need to sign up for an application host. We suggest using Heroku. Deploying Metabase and other applications to Heroku is as easy as answering a few questions about configuring the app.
Click the purple “Deploy to Heroku” button on the documentation page.
Enter a name for your app, which will be part of the URL for your app.
Click “Deploy app” at the end of the form.
Deploying Metabase to Heroku.
After a couple minutes, you should see that “Your app was successfully deployed”. This means that Metabase is up and running. To see it, click “View” at the bottom of the page. You should see the setup screen for Metabase.
Click “Let’s get started”.
Fill in your user information, then click “Next”.
On step 2, click “I’ll add my data later”.
On step 3, you can choose if Metabase is allowed to collect usage statistics. Either way works for us! Click “Next” after you have decided.
That’s it! Click “Take me to Metabase” to go to the application.
Set up your Metabase admin user.
Finally, we want to change the site URL to use https so your data is transmitted securely. From the Metabase homepage:
Click the Gear icon in the top right corner, and click “Admin” in the dropdown.
Click “General” in the left-hand menu.
Change the “Site URL” from starting with “http” to “https”. After a couple seconds, you will see a green check mark and “Saved” in the top right of the screen.
Step 2: Create a Database
We need a place to store the data for our data warehouse. Typically this is done in some kind of database like Amazon Redshift, Google Cloud SQL, or any kind of data store. For this tutorial, Heroku’s PostgreSQL database service is an easy choice because we are already using Heroku for Metabase. Setting up PostgreSQL on Heroku is almost as easy as deploying Metabase.
Adding Billing Information
This step adds a paid service, so we need to have a credit card on our Heroku account before proceeding. To add a credit card:
Click the app name you entered when setting up Metabase. This takes you to the application dashboard for your Metabase app.
Click on the Resources tab at the top of the dashboard to view services used by your application.
In the search box above “Heroku Postgres Add-on”, type in “Postgres” and click on “Heroku Postgres”.
Select “Hobby Basic” for the plan. This is a good starting point, but you might need to increase storage space in the future. If you approach the storage limits, Heroku will email you to let you know. See the Heroku Postgres page for more information on each plan.
Click the “Provision” button. You may need to provide billing information at this point.
Adding our data warehouse to our Metabase app.
You may be wondering why we are adding Heroku Postgres when it is already listed in our add-ons. The first Heroku Postgres add-on was added as part of installing Metabase and is used by Metabase to store its settings and configuration options. The second one we just added will store the data for your data warehouse, which is why it needs extra storage.
Step 3: Add Our Database to Metabase
Let’s wire up our data warehouse’s database to our Metabase installation so we can query it after we add some data.
After the new add-on is available (you may need to refresh), click the “Heroku Postgres” link for the Hobby Basic row. This takes you to the add-on’s Dashboard. We are going to get the credentials from this dashboard to let Metabase connect to our database
Click the “Settings” tab.
Click the “View credentials” button on the right-side of the page.
Keep this tab open. We will be copying these values in the next step and in Step 4.
Before we continue I’ll go ahead and mention this: please, please do not share these credentials with anyone. They will have full access to your entire data warehouse. That would be a bad thing.
Next, navigate back to your Metabase instance. If you did not copy the URL, you can find it by following these steps.
Click the Gear icon in the top right corner and click “Admin”.
Click “Databases” in the header navigation bar at the top of the screen.
Click the “Add database” button on the right.
Leave the Database type set to PostgreSQL.
Name your database whatever you like, but “Data Warehouse” is a good starting point.
Copy the Host value from the PostgreSQL Dashboard, and paste the value into the Host field in Metabase.
Copy the Port value from the PostgreSQL Dashboard, and paste the value into the Port field in Metabase.
Copy the Database value from the PostgreSQL Dashboard, and paste the value into the Database Name field in Metabase.
Copy the User value from the PostgreSQL Dashboard, and paste the value into the Database Username field in Metabase.
Copy the Password value from the PostgreSQL Dashboard, and paste the value into the Database Password field in Metabase.
Click the “Save” button.
Metabase is now connected to the database we set up!
Step 4: Set up and Configure Stitch
Stitch is a great service that can take data from many different sources, change it to a format to work with tools like Metabase, and puts it into our PostgreSQL database. This process, often referred to as Extract, Transform, Load or ETL, can take a team of engineers to develop and maintain. With Stitch, we can extract data from our Shopify store using Stitch’s Shopify integration and load it into our PostgreSQL database.
Stitch’s pricing depends on the amount of data transferred. They have a 14-day trial and generous free plan available. From there, plans start at $1000 per year. You should be able to estimate your costs based on volume during the 14-day trial to estimate the cost.
An Integration: Our Shopify Store
To get started with Stitch:
Create a Stitch account. Enter your email, name, company, and password then click “Save Account Details”.
You will be asked to start by adding an integration. Use the search box on the left to search for Shopify, and click the Shopify integration in the list.
Enter an Integration name. This will be used as the name of the schema in the database and cannot be changed later. So, make it something meaningful to you and your team like the name of your Shopify store.
Enter the name of your Shopify store.
Click “Authorize” at the bottom of the form. You will be redirected to your Shopify store to approve access for Stitch.
Choose which tables and fields you want to sync. Unless you have a reason not to, we suggest syncing all data if possible. While it will result in slightly higher costs, in our experience having the data already available when you need it is more than worth it.
Select tables and fields to push to the data warehouse.
A Destination: Our PostgreSQL Database
Now that Stitch is pulling data from Shopify, let’s give it a home. To do this, we want to create a Destination in Stitch.
Select “PostgresSQL” from the list of destinations.
Copy the Host value from the PostgreSQL Dashboard, and paste the value into the Host (Endpoint) field in Stitch.
Copy the Port value from the PostgreSQL Dashboard, and paste the value into the Port field in Stitch.
Copy the User value from the PostgreSQL Dashboard, and paste the value into the Username field in Stitch.
Copy the Password value from the PostgreSQL Dashboard, and paste the value into the Password field in Stitch.
Copy the Database value from the PostgreSQL Dashboard, and paste the value into the Database Name field in Stitch.
Click “Check and Save” at the end of the form.
With any luck, we’re in business! Stitch should start sending data from Shopify to our PostgreSQL database.
Step 5: Take a Look at Our Data!
…Well, eventually. For this initial sync Stitch is going to get the last year of data from Shopify which can take a long time depending on how much history you have. After this first sync Stitch only needs to get updated information and it runs much faster.
You can check progress by logging into Stitch and viewing the Shopify integration. You see a handy dashboard showing what is been extracted from Shopify, and how many rows of data have been synced to the data warehouse. Keep an eye on this dashboard to monitor progress.
Once the sync complete, you can wait for Metabase to sync itself sometime in the next hour. Or if you are impatient like me, you can tell Metabase to get the schema and data to appear right now.
Go to your Metabase application and log in if needed.
Click the Gear icon in the top right, and click “Admin”.
Click “Databases” in the header navigation bar at the top of the screen.
Click the name of your PostgreSQL database that we added in Step 3.
Click “Sync database schema now”.
Click “Re-scan field values now”.
Click the Gear icon in the top right, and click “Exit Admin”.
Refresh the page to see your new data.
Try creating a new question and you’ll see your freshly created schema and tables!
Let’s nudge Metabase to update our schema.
This is Just the Beginning
If you have not already, take a look at all those other Stitch integrations and there is almost certainly one available for another service you are already using.
For example, you could pull all your customer service tickets into your warehouse from Zendesk, Freshdesk, Intercom, and others. Or maybe export marketing campaign data from Klaviyo, Bronto, or Listrak. You can even export your Google Analytics and Facebook Ads data.
Once all of this data is in the same data warehouse, you can combine it to gain deeper insights into your business.
In the next post, we’ll show you how easy it is to create new questions, dashboards, and pulses in Metabase.
Need Help?
We are here to help you if you get stuck with setting up your data warehouse, or if you need help managing and scaling to suit your needs. We also can help you learn how to build insightful reports and dashboards. Contact us to get started.